Payment Coin has already been downloaded 185405 times. Follow the below instructions to download and install the secure Payment Coin digital wallet. Only download the Payment Coin secure digital wallet from our website (do not trust if the file has been sent to you from any other source).

STEP 1: Download the file to your local computer. For example C:\Podpaymentcoin
STEP 2: Double-click on the installation file
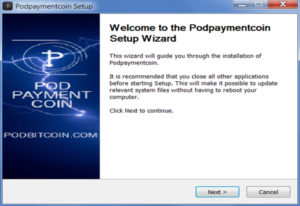
STEP 3: Follow the installation wizard prompts
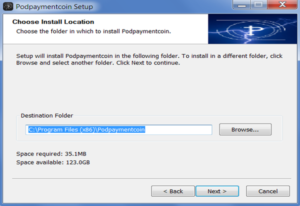
STEP 4: Installation complete
If you have an Antivirus program on your computer, it may incorrectly detect and remove POD Payment Coin. This is a false alarm. The reason for the alert is that the software contains the original Bitcoin miner component. This is required for solo mining from your PC and safe. The mining component has been approved and used in the Cryptocurrency and Bitcoin community since 2010.
The two options available are 1) Disable the Antivirus software for 15 mins and run the software. Or recommend to exclude the C:\Podpaymentcoin and C:\Program Files (x86)\Podpaymentcoin folders in your Antivirus software; reference McAfee , Windows Defender , AVG , Avast.
Congratulations you are now part of one of the most exciting cryptocurrency projects. The following is a quick start guide to using the Payment Coin network:
STEP 1: Launch Payment Coin Wallet
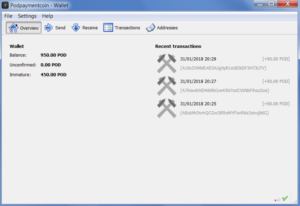
After installation, launch POD Payment Coin. You will see this default view that shows your wallet balance and recent transactions. A green tick at the bottom right of the wallet shows if you are connected to the POD Payment Coin network. Sometimes it may take a few minutes to synchronise.
STEP 2: Protect Your Payment Coin Wallet
Click ‘Settings -> Encrypt Wallet’. The first thing to do is encrypt your wallet. This is a very important step that you must perform. It helps protect your wallet and coins.
DO NOT forget your password. If you lose your password, you will not be able to access your coins in your digital wallet. Choose a secure password. You can check your password strength at https://password.kaspersky.com/.
STEP 3A: How to Send Payment Coins (POD)
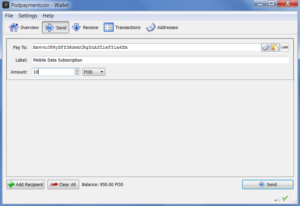
Sending coins is as simple as sending an email or WhatsApp message. Enter the persons unique address key in the ‘Pay To’ field and populate the amount. Add a meaningful reference as a label and click the ‘Send’ button. If you do not have any coins, use our giveaway to get some initial coins or contact us with your wallet address.
STEP 3B: How to Receive Payment Coins (POD)
Receiving coins is just as simple. Send your unique address key from the ‘Address’ field to the payee (in the screenshot this would be ‘A3TieF31a6fmXm4vnJPNySFf3RdwbCRgYn’. They will send coins to your unique address using step 3A. The amount sent will appear in your wallet.
STEP 4: Advanced Wallet Functions
Click ‘Help -> Debug window’. Then click ‘Console’ tab.
In the command line at the bottom type the following commands and click enter.
- getinfo = this shows general wallet info
- getmininginfo = this shows general mining info
Important safety note. DO NOT enter commands into the console that you get off the internet, forums or other third party personnel. We only recommend a few basic safe commands:
STEP 5A: getmininginfo
For the first 840,000 blocks to be mined, each block will reward the user with 50 POD coins. In the screenshot, you can see that 272 blocks have been mined by users. So in total 272 x 50 = 13,600 coins have been rewarded. You are mainly interested in the next block. So in this example the computer is trying to mine block 274. If the machine solves the equation the user will be rewarded with 50 POD coins. The lower the difficulty number the easier it will be to mine the next block.
What does getmininginfo mean? What does getmininginfo show?
- blocks = number of blocks mined
- currentblocksize = size of blocks in bytes
- currentblocktx = number of transactions included in the block
- difficulty = shows the current mining difficulty factor. Difficulty is increased as more users compete to mine the next block.
- errors = list any errors in the system
- generate = if you are mining or not (true = you are mining)
- genproclimit = shows -1 if you are not limiting processors on your computer for mining
- hashespersec = how fast you are mining (higher the hash number the better)
- networkhashps = the hash power of the network
- pooledtx = number of transactions in the memory pool
- testnet = shows if you are running in test mode (you should always see false)
STEP 5B: getinfo
The getinfo command shows additional software version and balance information.
STEP 6: View Transactions
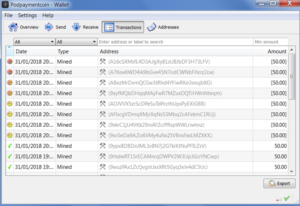
The wallet ‘Transaction’ view shows you the latest transactions; both mined coins and transfers that you have done to people or companies.
STEP 7: Add Additional Nodes
Run following commands in console:
addnode 159.65.86.245 add
addnode 46.101.34.238 add
STEP 8: Backup Wallet to External Device
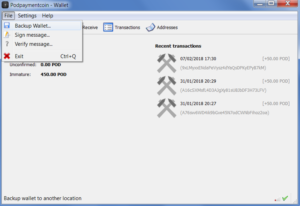
It is good practice to backup your wallet regularly. In the event you lose your laptop or your computer gets corrupted, having safe backups ensures you get retrieve your wallet and coins.
For users with less than $10,000 worth of coins we recommend the iStorage IS-FL-DA-256-4 4GB datAshur 256-bit USB encrypted flash drive
For users with more than $10,000 worth of coins we recommend the iStorage IS-FL-DA3-256-4 4GB 256-bit datAshur PRO USB 3.0 secure encrypted flash drive
